This page attempts to explain the steps in casting a Preston like
mitre gauge. Just the pattern, core box and casting are shown on page 63
of Jim Kingshott's Making and Modifying Woodworking Tools.
How it all fits together at the foundry is left to the readers
imagination- unless the reader knows about pattern making or this page.
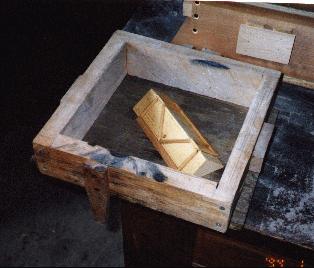
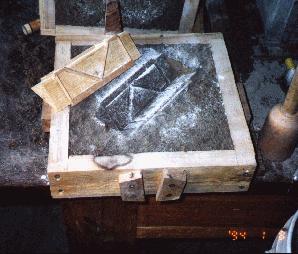
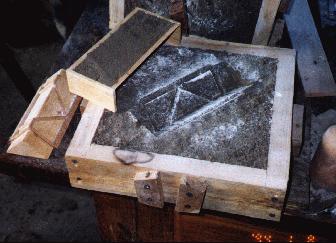
Pattern placed in the drag (bottom half) of the flask
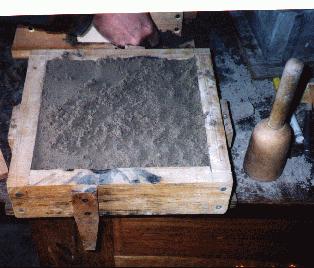
The pattern was dusted with parting compound. Molding sand was then dumped in and rammed around the pattern.
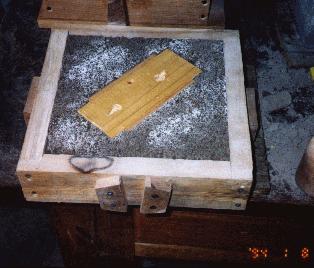
The drag was then turned upside down. You are looking at the bottom of the pattern. The white stuff is the parting compound.
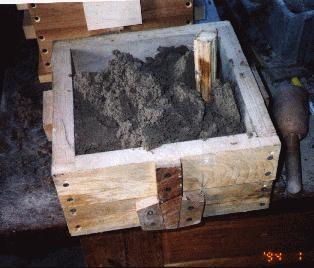
The cope (top half) of the flask is placed over the drag and filled with molding sand. A sprew pin (a dowel rod) is put in place. The pin will be withdrawn later and eventually molten metal will be poured down the hole left behind.
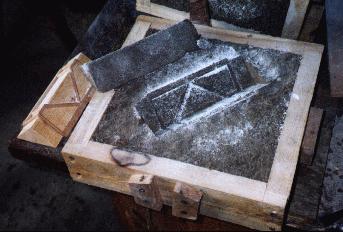
The flask halves are separated. Here is the drag half with the pattern still embedded in the sand. (picture repeated for clarity)
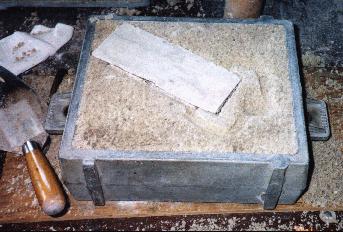
The pattern is then withdrawn, leaving a void that matches the patterns shape. We wouldn't want to pour in the molten metal yet. If we did the casting could come out exactly like the pattern- which isn't what we want. We will add a sand core to reduce the volume of molten metal the mold will hold- giving us the casting we want.
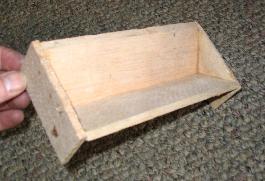
Here's a picture of the empty core box. It's job is to produce the prism shaped lump of sand to fill the portion of the mold we don't want solid.
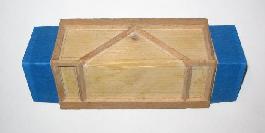
Here's the pattern with some blue tape applied. This area is referred to as the core print. It creates a shelf to support the core. If the core was the same width as the pattern (without core prints), the core would fall into to void.
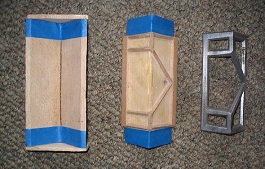
From left to right: the core box, pattern and casting. The core box has the same blue tape to hopefully tie this all together. The pattern and its core print create a void that is partially cancelled out by the core. The moldten metal can flow into the the area that's left - which gives us the casting we want.
The core box is filled with molding sand to which a small amount of molasses and water has been added
The core is removed from the core box and baked for an hour at 350°F
The core is carefully dropped into place. The lighter color is the bottom of the cooked core
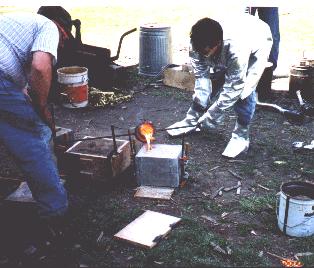
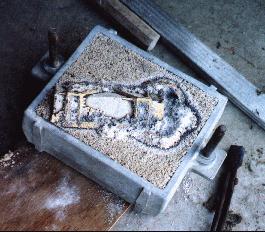
The sprew pin is removed from the cope and then placed over the drag. Molten brass is then poured into the mold
What appeared after opening the flask. The lighter colored area is the baked core
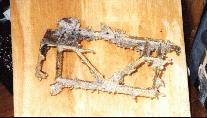
The casting remains after chiseling out the core. Something that with a little cleanup will look like a Preston mitre gauge!
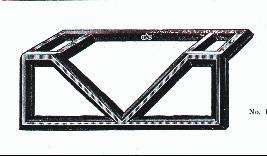
From the 1909 Preston Catalogue: Improved Square and Mitre Templet. For Mitreing and Squaring up the Ends of Wood. No. 1475 Nickel Plated, 6 inch.
The gauge is for laying out 45 degree mitres and transferring marks from a boards edge to its face etc. At Tiller's (where the casting class was held) they said it would be a handy thing to have when timber framing!
Click here
to read my oldtools post about this. (note that the links in the post are no longer valid.)
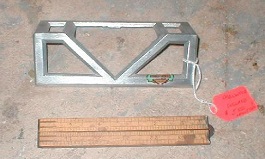
A few months after casting this gauge I found one for $5 at
a tool meet. Pretty funny since the one I cast cost a few
hundred dollars (transportation, tuition and lodging).
The decal says "Smallwood Birmingham England".
The opposite side has this stamped into the aluminum:
"Makers Smallwood England"